
Range Rover P38 # 078 - Fuel Tank Pump and Sending Unit
For at least a year I've had intermittent hard starting issues, especially when the fuel tank was 1/4 or less full. When I now came home after a months vacation where the car was parked in my garage (with 3/4 tank) and not used it would crank but not start.
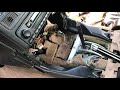
Trying to jump relay 12 to force the tank pump to run didn't result in any fuel arriving at the injection pump, so I was pretty confident it was the in-tank fuel pump and sending unit (fuel gauge sensor).
Since the car was parked very close to one of my lift posts, and because I live in a really rust-prone area where the roads are salted I decided against dropping the fuel tank to gain access to the fuel sending unit. Also I'd have to drain the tank which was around 60-70% full. It would also require removing the rear right fender lining to remove the fuel filler neck assembly. Again, this would also probably be very rusted and I'd most likely break some, if not all, of the fasteners like with the fuel tank.
I took an alternate route which I've actually read about a few years ago. So I Googled up the procedure:
https://www.land-rover-blog.co.uk/how-to-change-the-in-tank-fuel-pump-on-a-range-rover-p38/
https://www.landyzone.co.uk/land-rover/tank-fuel-pump-template-p38.109368/
The procedure is to cut a hole in the floor under the rear right seat bench to gain access to the sender unit from the trunk. This is a fairly straight forward procedure that I slightly modified from the original posters above. I decided to cut the hole a bit larger towards the right of the car to better gain access to the filler neck breather hose.
TAKE GOOD CARE NOT TO CUT WIRES OR HOSES when you cut the hole. Only cut just through the floor steel.
- Cut the carpet 14 cm (5.5") from the inside of the right side and left side of the seat bracket.
- Cut the carpet about 28 cm (11") from the front of the seat toward the trunk.
- Cut the floor panel about 20 cm (7 7/8 ") from the front of the seat towards the trunk.
- Cut the floor panel about 3 cm (1 5/32 ") inside the left cut on the carpet on both sides so that you include two "ridges" of the floor pan.
Leave the front of the floor un-cut and bend the floor panel up, and then back down once done.
Remember to apply anti-rust coating and seal the panel back in place to avoid leaks. See: https://youtu.be/Wkrqpd6rHmM
I decided to use a dremel-like cutter / saw (oscillating multi-tool) to avoid sparks from an angle grinder. Also the steel isn't too thick so it doesn't take too long to cut the hole.
Once in there I noticed a lot of rust on the pipe connectors, which broke off of the sending unit once I tried to loosen them. This resulted in me having to fabricate my own fitting that would fit over the fuel sending unit outputs and over the original plastic lines going to the engine bay.
You'll just barely make them fit over the lines and make sure you just cut enough off of the original plastic lines to keep as much of them as you can. I cut about 3/4" off which is just where the metal fitting inside the plastic line ends.
Using 7.5 x 13mm fuel line which fit snuggly and nice over the sending unit pipes and the black plastic lines after reinforcing the plastic lines with pieces of plastic tubing to avoid the plastic lines collapsing once I tighten down the hose clamps.
I'll replace the temporary spliced fuel line with fuel hose going under the car and splicing into the plastic line under the car for better access for future maintenance. When I do that I'll anti-rust coat and seal the cut floor access lid in place.
You'll want at least these parts:
ESR1111 - DIESEL fuel sending unit and pump
STC4344 - GAS fuel sending unit and pump
NTC5859 - Sending unit gasket to fuel tank
I strongly recommend the PM353 (or Britpart DA1209) tool from Paddock (www.paddockspares.com) to loosen and fasten the lock ring (NTC6872) that holds the fuel sending unit and gasket in place. The tool takes a standard 1/2" ratchet with an extension.
If you're lucky you can reuse the plastic line connectors with a pair of:
NRC9770 - Fuel line nut (x2)
NRC9771 - Fuel line olive (x2)
Relay 12 (fuel pump relay) is powered by relay 19 via fuse 39 (20A) in the engine bay. Relay is energized in three ways:
- When glow plug # 6 is energized
- When the alternator is charging (+D voltage present)
- When the starter motor is active
Schematics:
https://drive.google.com/open?id=1Ltje4rkJYdTu3NvTLMJ26VDGzBrNElZS
This means the pump runs continuously while the is running. The pump shares a common ground with among other things the fuel gauge and all relays in the fuse box. If the fuel gauge works, you know grounding is ok.
You can reach me at gamuso@gmail.com if you want to get in touch with me.
Follow me on Twitter: https://twitter.com/0ddj4rl3 or Instagram: https://www.instagram.com/0ddj4rl3
Please consider subscribing. And as always please comment below and I'll respond as best as I can.
Thanks for watching, and I hope you found this video interesting. "

Vous devez être connecté pour poster un commentaire
 Français
 English
